So you want to transfer an image from one surface to another? Here are some techniques I have used/developed and tried with my students over the past 12 years.
Xerox/Laser Transfer
I did not invent this, folks have been doing it for a while and if you apply the glue correctly is does work. The Xerox and laser process uses heat to melt toner/pigment [basically colored plastic] to the surface of the paper creating the image. To transfer the image you will need glue and a fairly fresh Xerox or laser print. My favorite glue is Golden’s matte soft gel, a very versatile acrylic medium. Cheap paper makes for the easiest transfer* as the image/toner will be glued to the surface for the transfer and the paper must be dissolved away from the toner/pigment of the print. Remember the white and light areas will show whatever the surface is that they have been transferred too.This technique works to transfer onto paper or acrylic surfaces.
*Note – see update (Update: Improvement on Xerox or Laser Transfer – water dissolving paper!).
- Mist the paper with the xerox/laser image with water and let it relax. [paper stretches when wet, if the paper is a little wet it will stretch less and wrinkle less in contact with the water based matte soft gel.]
- Apply a thin even coating of matte soft gel to surface that you wish to put the transfer on. A card or pallet knife works well.
- Place the damp xerox, image side down on the glue. Gently press it in place being sure not to squeeze out all the glue .
- Gently take your finger and wipe away the excess glue, careful to wipe away from the paper.[ Excess glue on the paper will keep the paper from being dissolved away from the image later]
- Let it dry for at least 2 hours. The matte glue must be completely dry for the next step to work. Saturate the paper with water and start rubbing off the paper. The image should be left behind. You may have to keep wetting and rub a lot.
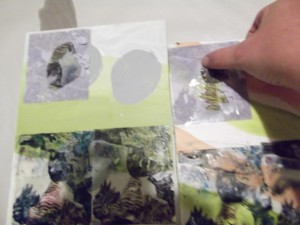
Wetting the dried xerox and rubbing off the paper
Inkjet transfer with and without a press
The ink inkjet printers is water based, basically for our purposes, watercolor. I did this demo at a conference a number of years ago and where I used to use ready made inkjet transparencies. I now make my own. The formula for ready made transparencies kept changing and were expensive. I now use a plain xerox transparency and coat it with Golden’s Digital Ground for Non Porous Surfaces.
Take a plain xerox transparencies and squeeze the digital ground in a zig-zag pattern across the surface. Spread evenly with a soft brush. Let it dry and you are ready to put it through your inkjet printer.
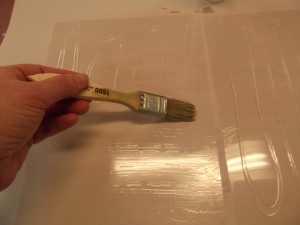
Spreading the digital ground
With on press transparency transfer the transparency is place on wet paper and run through the press. The gum coating that holds the ink on the plastic transparency dissolves slightly releasing the water based ink into the paper. For all you printmakers, the transfer may be printed over watercolor monotype and under all media including watercolor, water miscible and oil based ink. It may be registered with relief, etching or lithography to add a color “plate.”
The image transfer without a press uses a layer of gel medium to “soak” off the image from the transparency. The transparency is place on a layer of gel for 2 to 3 hours. Then the plastic is removed and the image is left behind. The image may be softer but depending whether the inks jet uses dye or micro pigment based inks and may be used over painted textures and canvases for a truly transparent collage.
On Press Inkjet Transparency Transfer
This is a particularly useful technique to use with watercolor monotype since they are completely compatible. It can also be used under all other print processes and is particularly effective for a color plate under a key plate photo intaglio image. The technique is readily available to most people as most of us have inkjet printers, and many have archival inks available because people want their photos to last. While the image is limited to 8”x 10” the image may be transferred to a much larger piece of paper.
The image transfer with a press produces a crisp ethereal image with a quality unlike the direct print from the computer. Images appear almost continuous tone, even from cheap printers, because of a reduction of pointillism.
Make sure you print on the correct fuzzy side because that is the side that has the gum coating. (otherwise the image just beads up, an interesting effect when transferred but not optimal.)
- To do the transfer with a press, soak paper the correct amount of time. Rives BFK about 15 minutes, but other papers work including Asian and mulberry papers. The key is to control the amount of water in the paper. Blot paper very well.
- Adjust the press pressure heavy enough to print a thin etching plate
- Cut the image to be transferred out of the transparency.
- Place the printmaking paper on the newsprint on the press.
- Position the image transparency on the paper image side in contact with the paper.
- Place clean newsprint over the image and run the print through the press.
- Without moving the blankets run the print back through the press. You should now be able to gently lift the plastic from the paper.
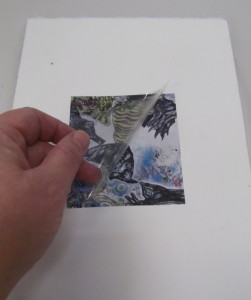
Plastic is lifted from the surface leaving the image
Hints:
- If transparency sticks run the image back through the press to redistribute the water.
- If using thin oriental papers use 2 dampened pieces of newsprint under the main sheet of paper.
- Canvas and cloth can be used as well to transfer on to. Just make sure the fabric is wet.
- When creating a color layer for use under a traditional style print scan a plate or matrix rather then a prof to get the correct size for the image.
- This technique has been tested with both HP and Epson inks. Some inks release better then others.
Sometimes areas with no ink on the transparency will stick that’s why I recommended cutting the image out of the transparency. - Prints may be re-dipped for printing more layers of what ever on a print. I recommend giving the dry inkjet transparency transfer a good spray with a matte spray acrylic before re-dipping.
- You may manipulate the transparency by adding watercolor or wc marker to the transparency before printing. Just make sure the transparency is completely dry before trying to print.
Off Press Inkjet Transparency Transfer
This can be used on any surface. The best medium I have found is the Golden product, Matte Soft Gel. It is available from any art supply and craft store that sells Golden products.
- On paper; Card Matte Soft Gel so you have a thin layer in the place where you want to print. It should be slightly white (the acrylic will dry clear) about a 16th of an inch think.
- Place image jelly side down on acrylic. And gently press into good contact from the center out. You may squeeze some extra acrylic out but push too much and you may squish out your image or have no “glue in which to dissolve the image.
- Wipe this excess away with your finger wiping excess on a rag (Matte medium will not show up shiny when dry).
- Let the image sit to soak off the plastic for about 2 hours. You can then lift he plastic off the image will continue to dry and the image will be transparent.
On non porous surfaces such as acrylic paintings:
A porous surface is helpful to allow the acrylic medium to dry between acrylic surface and the plastic of the transparency. Tar gel, another Golden product is a porous surface. I coat the transfer area first with a thin layer of Tar Gel and let it dry completely before adding the Matte Soft Gel. This helps the layers dry between the plastic.
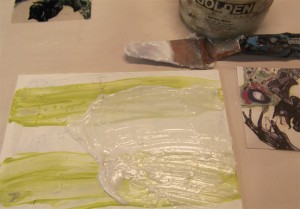
Spreading the mat soft gel. This is actually a little thick, and should be a little bit smoother.
Hints:
- If the image comes out partially you probably did not let it dry enough time before removing the transparency. Or you got the medium to thick.
- If you did not make complete contact with the medium and the transparency you image may have blank bubbles in it.
- These images come out very transparent, you may put down a transparency and transfer in image. If the image does not come out dark enough you may repeat the process over the previous transfer. This also works if some areas were incomplete.
- Practice doing this technique on something unimportant until you get the hang of it. It can be a little tricky.
- Epson ultrachrome inks are micropigment based and make for the clearest transfers using this method. HP printers often have micropigment black but not the other colors so the key or black images come out very clear.
UPDATE
A new method has been added to make this process much easier. Please read Update: Improvement on Xerox or Laser Transfer – water dissolving paper!
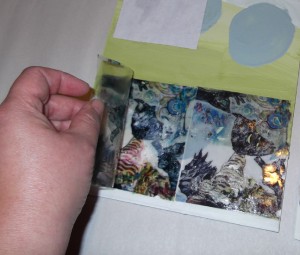
Lifting the transparency plastic off the transferred image. The right image is ultrachrome inks, the left use die based inks.
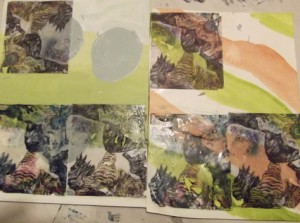
A blurry photo of some done transfers....


5 comments
Skip to comment form
Dear Margaret
very wonderful interesting “stuff” and open to lots of creative ideas!
I am interested in printing on plaster of Paris, Venetian plaster or any of these compounds. Any suggestions on what type of transfer would work best? I want to use my own photographs and transfer them onto my handmade plaster tiles.
looking forward to hear from you,
Sincerely,
Nury
Author
As long as your plaster tiles are dry from the forming process. Matt soft gel will glue to them. The Xerox transfer method should work fine.
Do you have a video of this process. It confusing to read
Author
Nope. I have only done a video for the targel process. I probably should at some point.
As a long time transfer enthusiast, these tips are priceless! I’m off to make my own inkjet transparency sheets, as I have the Digital Ground for Non-Porous Surfaces but hadn’t thought of using it for that application. That it can then be the ink receptive layer that later melts into freshly applied gels and mediums is doubly smart. Thank you for your generous sharing.